Bland, boring, white. Banjo counter. Ugly medicine cabinet. Words that describe the original bathroom in our condo. It all had to go!
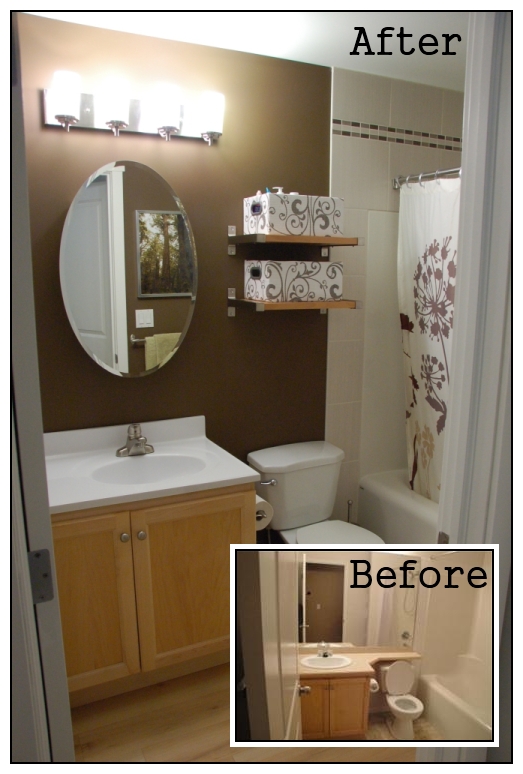
Let's start at the bottom and work our way up.
Flooring: Originally, we had some faux-tile lino that was also in the kitchen and laundry room. For lino, it actually wasn't too bad; unfortunately, the cut line between it and the carpet in the kitchen was on a really weird angle, and the inherit awkwardness it created for furniture placement spoiled me on all the original flooring. In one fell swoop we replaced everything in the living room/kitchen, hallway, laundry room, and bathroom with a "maple plank" resilient vinyl made by Armstrong. I'm in love!
Cabinet/counter/sink: We looked at getting a new cabinet, but it wasn't in the budget. Replacing the sink and banjo counter top was non-negotiable, though. We found a reasonably priced all-in-one Carrara marble sink and counter with a right centered sink. It was perfect! Increased usable counter space, pretty, and no additional cost for the sink! Add a new, affordable faucet in brushed nickel to match the other hardware in the room and we're done!
Tile: The original builder's tub and surround is one solid piece. I'm not a fan. We inherited a few scratches from the previous owner and have added a couple of our own (fortunately all minor!), and it doesn't have a ledge on the wall-side, which means limited space for bottles and soap, and no where to rest my left arm when having a bath. But the cost to replace it was prohibitive, so I conceded, and it stayed. But the bland, boring, 6x6 white tile around it had to go! We looked long and hard before deciding on a dark cream tile with lots of light lines running over it in various neutral shades. I liked the tile when we found it. I LOVE it on our walls. It's as timeless as tile can be (a good thing, because I don't think anyone will ever want to replace it!), and all the neutral details means you can put just about any colour in the room and it will blend. A bit of an indulgence on my part was the row of detail above the surround. It more than doubled our tile cost, but I love the additional bit of visual interest it adds.
We also put some tile around the sink counter to give it a more finished look (and to hide how horribly out of square the walls are). Ryan is getting pretty good at tiling. I can place tiles just fine and do the final bit of de-glazing when applying the grout, but I think tiling is one of my least favourite renovation projects.
Mirror: With the removal of the banjo counter top the original wall-spanning mirror didn't work. We also had the ugly medicine cabinet which had to go, but removing that meant loosing valuable storage space. Ryan grudgingly removed and patched the medicine cabinet much to my delight after I found an oval mirror with a medicine cabinet behind it. I love the look of the floating mirror, and the additional storage is much needed in this tiny space.
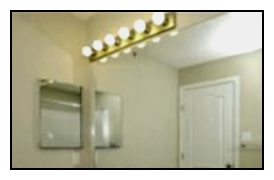
Lighting: Casting call! The original Hollywood lighting bar across the top of the mirror was awful. Getting rid of it was one of my top priorities in the bathroom. Unfortunately, the mount was centered over the vanity, and our sink was now several inches to the right, and unless we were willing to hire an electrician, go through the condo board, and do a bunch of drywall patching, it wasn't moving. We looked for quite a while to find lighting that would fill the room, not damage our wallet too much, and still give us some play horizontally. Ryan did an awesome job semi-centering the lighting and mirror over the sink - at least as much as existing structure would allow.
Paint: The bathroom was originally white. We wanted to keep to a neutral pallet so skin tone didn't change too much, and we could switch between our blue and green towels. Brown seemed like a nice meeting place, and it would add some dark drama in our otherwise light space. It was a surprising challenge to decide on a colour, but we're really happy with how our "light" brown ended up.
Other details: We already had some open shelving that was a reasonable match for the cabinets, so we installed that over the toilet for additional storage and found a couple baskets at Bouclair to keep our junk in. Shortly after moving in we picked up some shelves for the shower at WalMart for cheap which has made the tub way more organized. The towel bar, toilet roll holder, robe-hooks, and hand-towel ring were all replaced thanks to stock changes at my dad's work. We also picked up a new garbage can, soap dish, and toilet-brush caddy to really bring out the brushed nickel in the space. I didn't want to introduce any new colours, and still wanted the freedom to change my towels up. A couple over-sized photos from our New Zealand honeymoon on the wall, and the room was finished!
Overall, I think the bathroom is my favourite renovation we've done. The total budget was about $800 for everything, with the tile taking up a large chunk of that, but worth every penny for the drama it adds!